With these parts together, the door can be fit into the stove body. See more ideas about wood stove, stove, wood burning stove. 4 x 10” cut at a 45º angle so one edge is 10” and the other 6” (sides of chute) 2 ea.
Wooden graduation card box
Wood burning pen marker
Wood and iron fence
DIY Wood Stove made from Car Wheels! Easy Welding Project! Bacon
3/16 x 1 x 8¾” cut with 45º on both ends such that.
1½ x 12” these will be notched to interlock each other and the top of the stove.
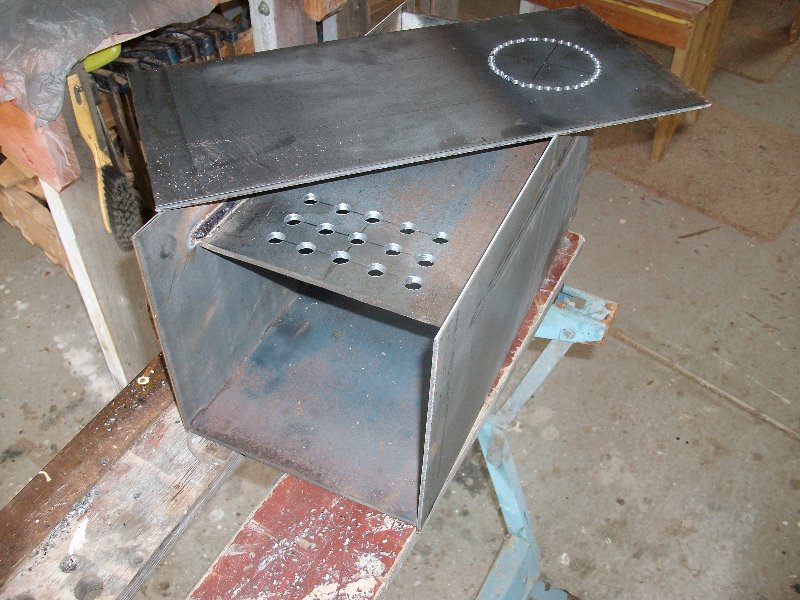
I used 2 flat bar for accessories such as handle, hinges, and draft door.Then weld the front and back of the chimney on the inside of the stove and the left and right on the outside of the stove. To enable the sheet steel to bend evenly you need to grind a groove on the inside, kind of like scoring card to fold it.Ok, so actually starting making here!
3/16 x 1 x 12” cut with 45º on both ends such that it forms a trapezoid.This may or may not slightly warp the steel, so it is best to get this out of the way before putting too much effort into fitting the door and stove bottom. The box finishes up at 500mm long x 200mm wide x.To make the rack as i have, take the flat bar and drill a small hole in the center of it.

Here's a photo of a wood stove i made.
Now you can assemble them and weld it on top of the stove.Preferably the same size as the thickness of the flat bar. I drew my own blueprints and used 3/16 mild steel for the stove, but used 1/4 for the top for a stronger hold with regards to heat buildup.Once the hole is done, make two parallel cuts from the top to the hole.